Pre-ride ‘M check’
Initial Bike and Safety Equipment Check over
With the training plan soon to be release now is the time to check your bike and safety kit over to make sure your kit is as ready for the big day as you will be.
Firstly, let’s have a check that your helmet is in good condition and not too old. The common advice is that you should look to renew the helmet if it is anything beyond 4 years old. Industry advice is that the foam slowly degrades and the level of shock absorption decreases with age. If the helmet is in date give all the straps, clips and adjusters a really good look over and if there are signs of fraying etc you should think about renewing it.
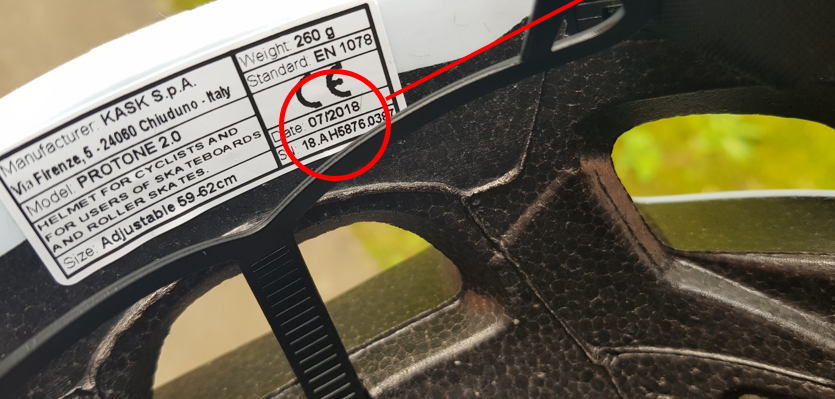
There should be a sticker inside the helmet telling you when it was produced. The image below is taken from my road helmet and you can easily make out the manufacture date.
If in doubt, and you can afford it, treat yourself to a new one. Although it’s not to everyone’s taste I personally wouldn’t ride without a helmet and you really can’t put a value on your brain! You don’t have to spend a fortune and there are always deals available from one of the big online shops like Wiggle or Chain Reaction Cycles.
I will now talk you through a quick and easy way to give your bike the once over and explain a few details along the way. Apologies to the more advanced riders who know a lot of this but it isn’t a bad habit to follow even if you know the detail already.
The method is called the “M” check and offers a logical path and check order. (see next image)
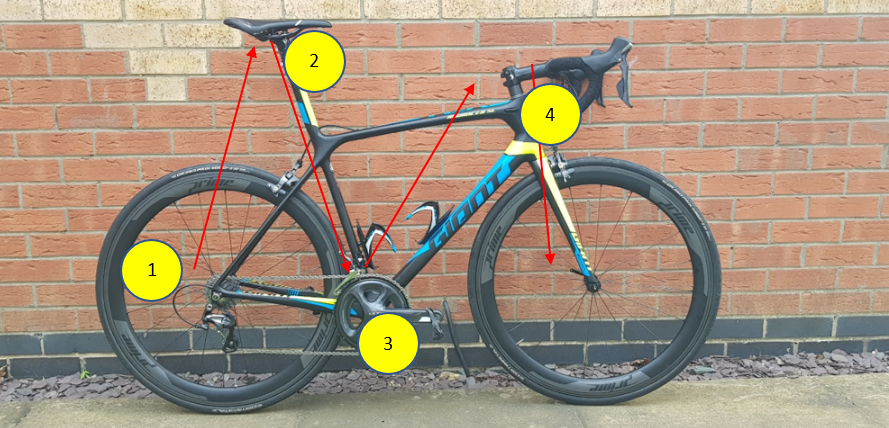
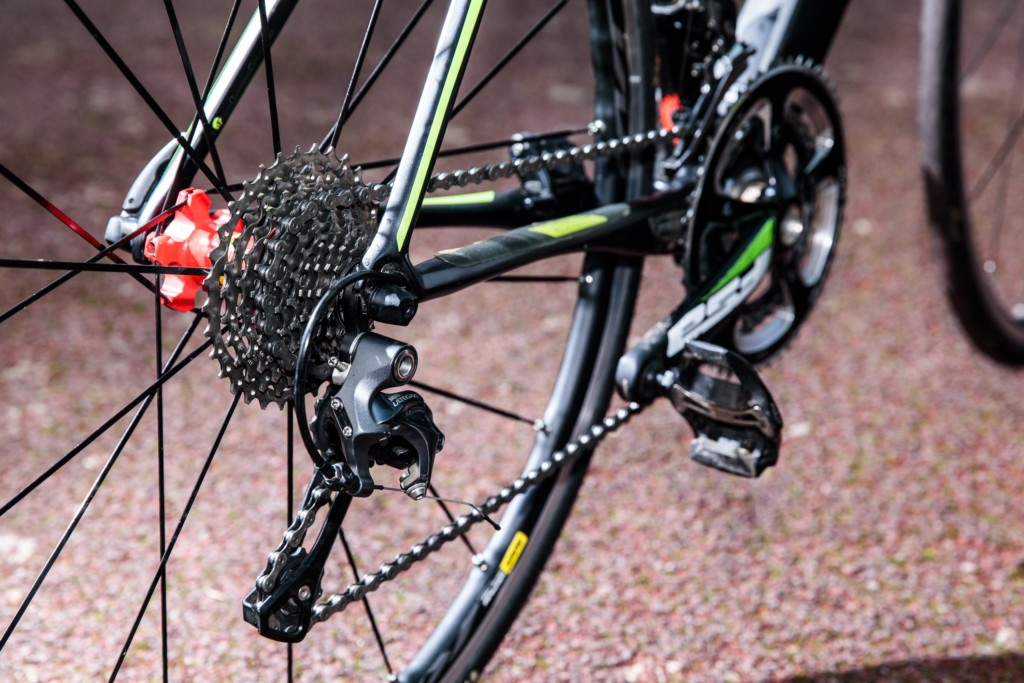
1. Starting at the rear wheel on the drive (chain side) make sure the back wheel is secured properly by the skewer or nuts. Have a look at the rear derailleur and chain making sure they are clean and that the chain is free to travel around the 2 small jockey wheels. Lift the back wheel and turn the pedals by hand to check. Then move up and check your tyre pressure. See the tyre side wall for guidance on this or check on google for the correct pressure for the width of tyre you have fitted. Lastly move up and check your rear brake. Make sure it isn’t rubbing against the wheel as you spin it and that the brake pads have plenty of “meat” left on them.
2. Start with your seat and seat clamp. Check for security and that there is no fore and aft movement. Next check the seat post clamp. Move down via the bottle cage to the front derailleur making sure it is clean and that it moves up and down across the 2 or 3 cogs you may have at the front of your bike. While you are at the cranks / pedal arms have a good look at the whole area for general cleanliness and freedom of movement. If there are any grinding noises when you turn your pedals around you may want to get your bike into a shop and get it checked out properly. Bearings don’t last forever and this is a common issue.
3. From the cranks / bottom bracket area move up the sloping down tube checking the security of your bottle cages on the way up to the bars. Main thing is to check the security and condition of the bars and the bar tape. Does the stem and bars align with the front wheel? If not get it straightened out. Do you have both bar end plugs?
4. Move down via the front brake checking for rubbing and a good amount of material left on your pads. Check the tyre pressure and finally ensure your front wheel is properly secured. This is a massively important check on race day after you have had the wheel out to fit the bike into your car.
That’s it done.
If you have found anything that you’re not happy with get it checked out by a professional asap.